고정 헤더 영역
상세 컨텐츠
본문

쿠키의 다양한 설정 옵션
Session cookies vs Permanent cookies
만일 쿠키를 생성할 때 Expires나 Max-age와 같은 값을 설정하지 않았다면
그 쿠키는 사용자가 인터넷을 종료하면 사라집니다.
이런 쿠키를 Session cookies라 부릅니다.
반대로 Permanent cookies는 사라질 날짜, 시간 등을 정해놓았기 때문에 사용자가 나가도 그대로 유지됩니다.
Session cookies와 Permanent cookies 만들기
아래는 part1, part2에서 작성한 코드 내용입니다.
const http = require('http');
const fs = require('fs');
const url = require('url');
const qs = require('querystring');
const cookie = require('cookie');

const server = http.createServer((req, res) => {

  const {pathname} = url.parse(req.url);
  const {query} = url.parse(req.url);
  const {name, birth_date} = qs.parse(query);

  if (pathname === '/user'){

    if (req.headers.cookie){
      const cookies = cookie.parse(req.headers.cookie);
    };

    res.writeHead(200, {
      'Set-Cookie' :
      [
        `name = ${encodeURIComponent(name)}`,
        `birth_date = ${birth_date}`
      ],
      'Content-Type':'text/plain; charset=utf-8'
    });

    res.end(`OK! We've received your profile.
    \nYour name : ${name},
    \nYour birthdate : ${birth_date}`);
  } else {

    fs.readFile('./server_content.html', (err, data) => {
      res.writeHead(200, {'Set-Cookie': 'user-info = testing'});
      res.end(data);
    });
  };
});

server.listen(8000);
name과 birthdate 중에 name을 permanent cookies로 만들어보겠습니다.
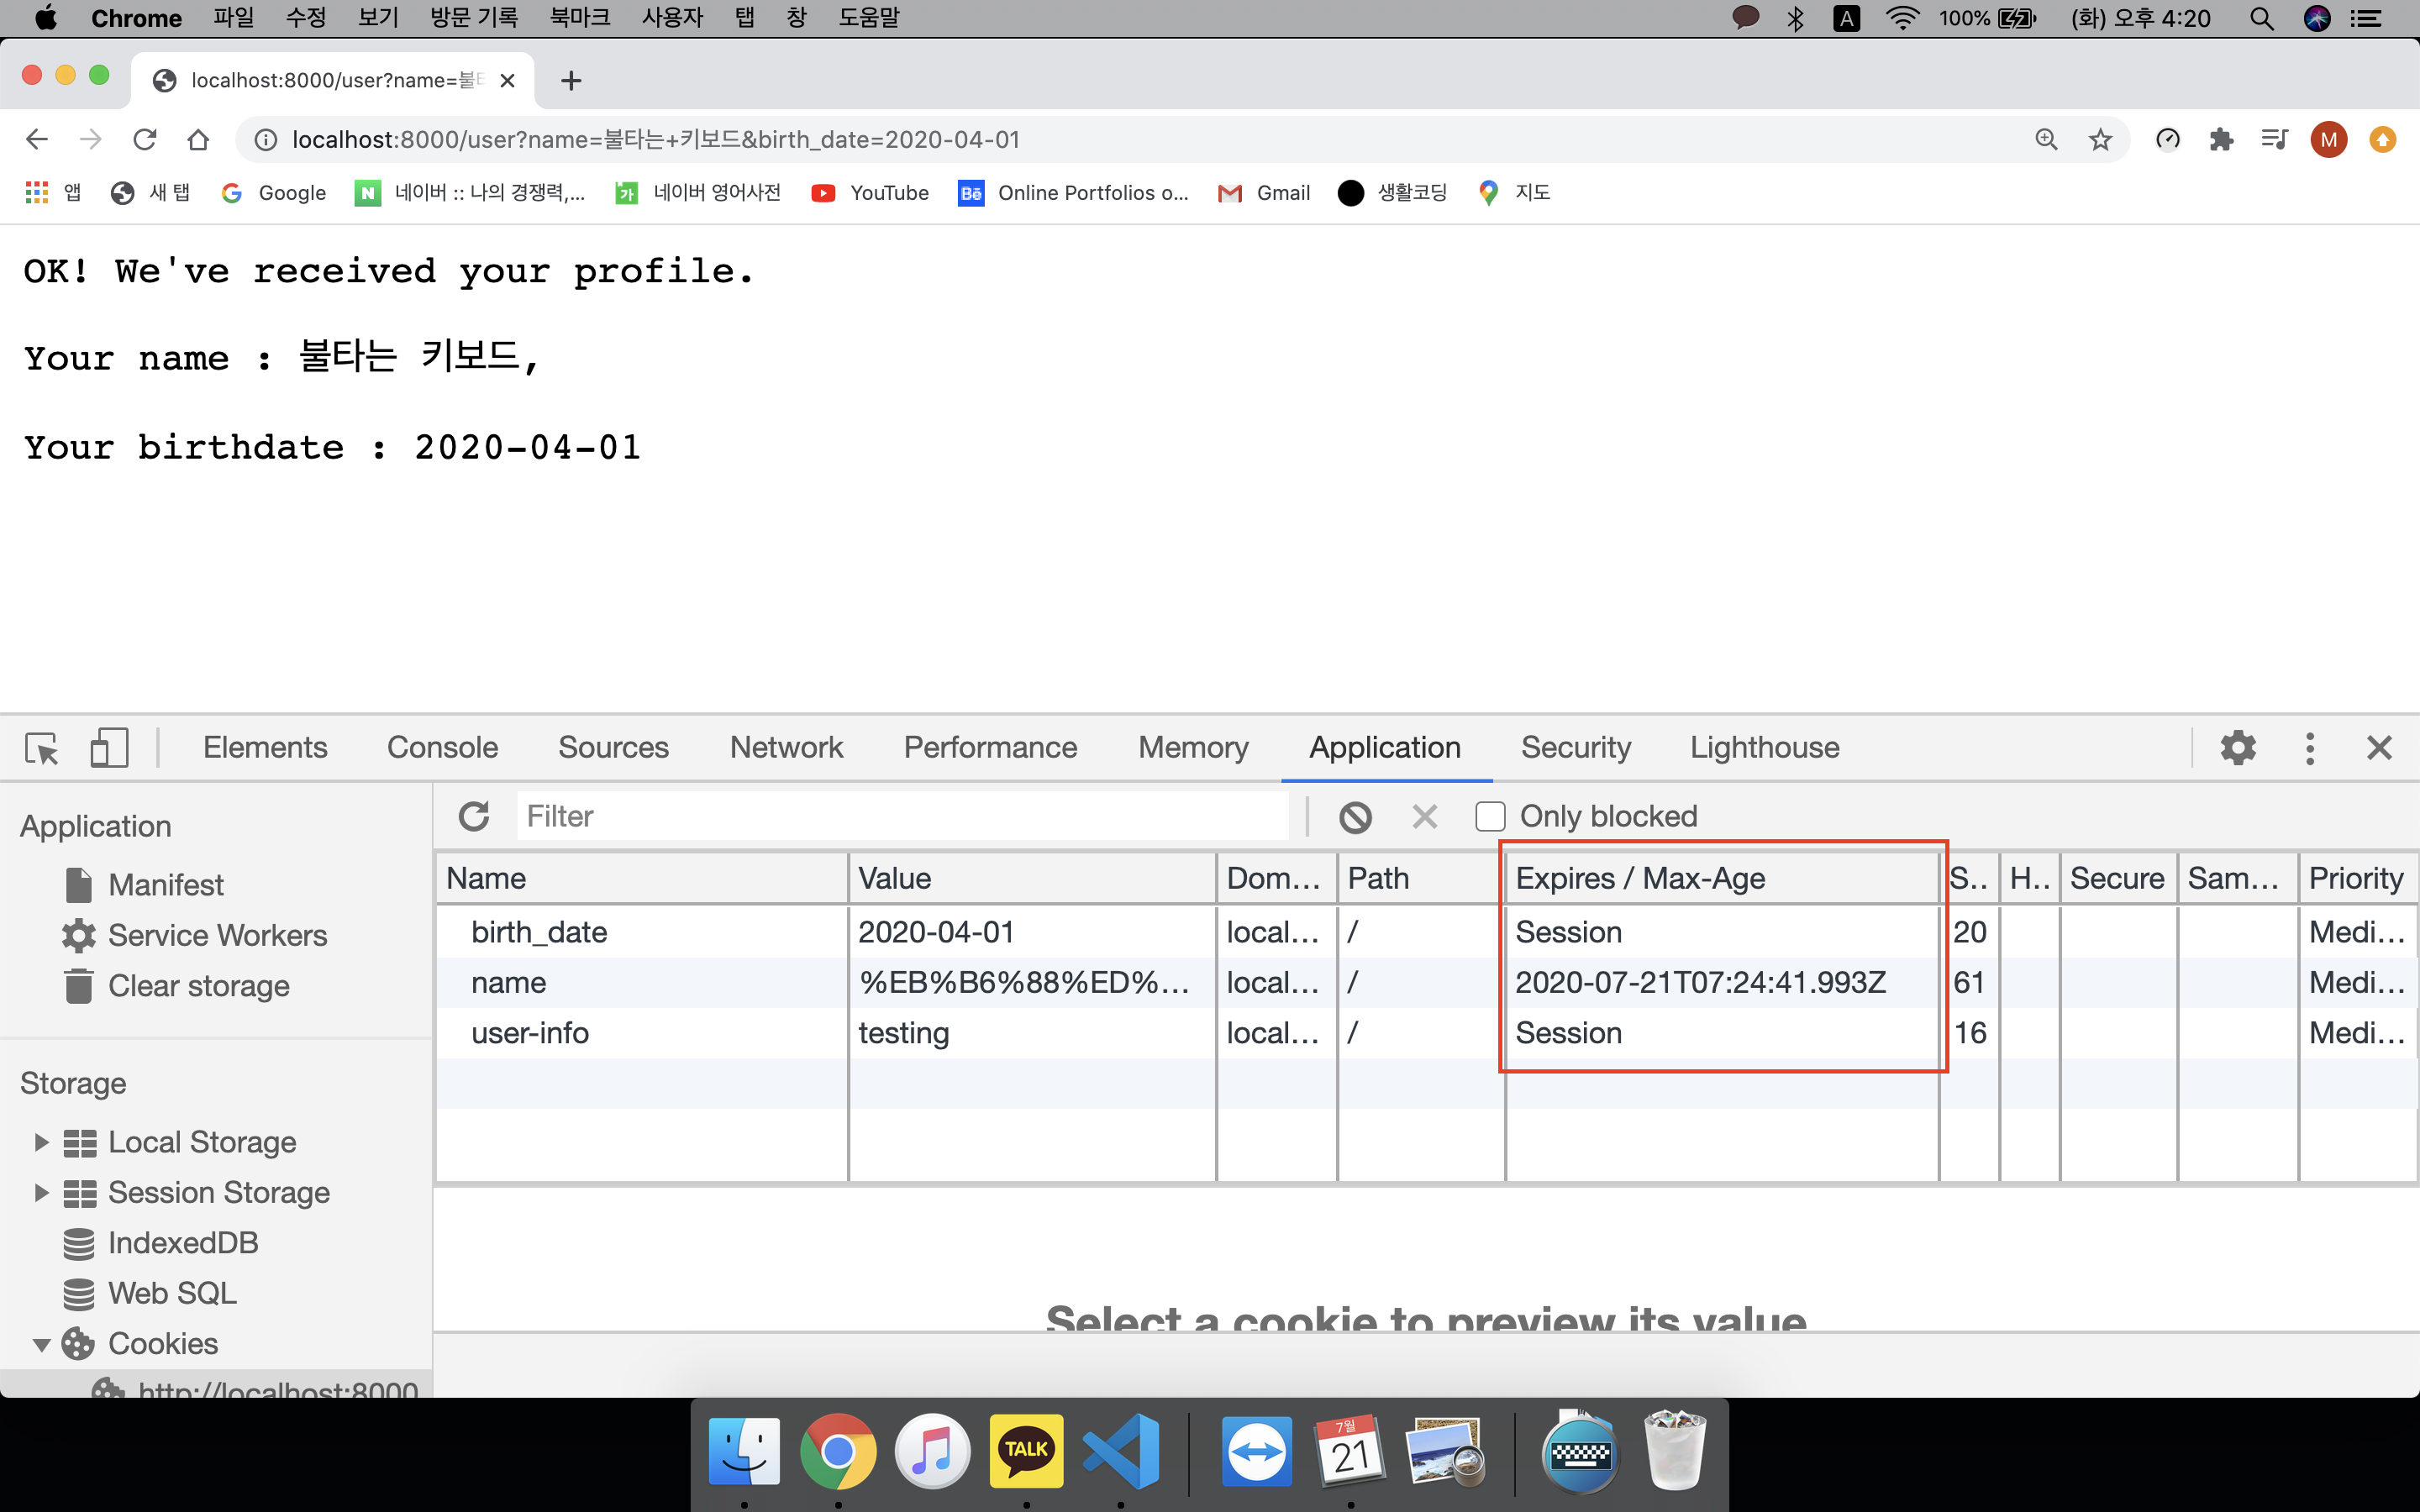
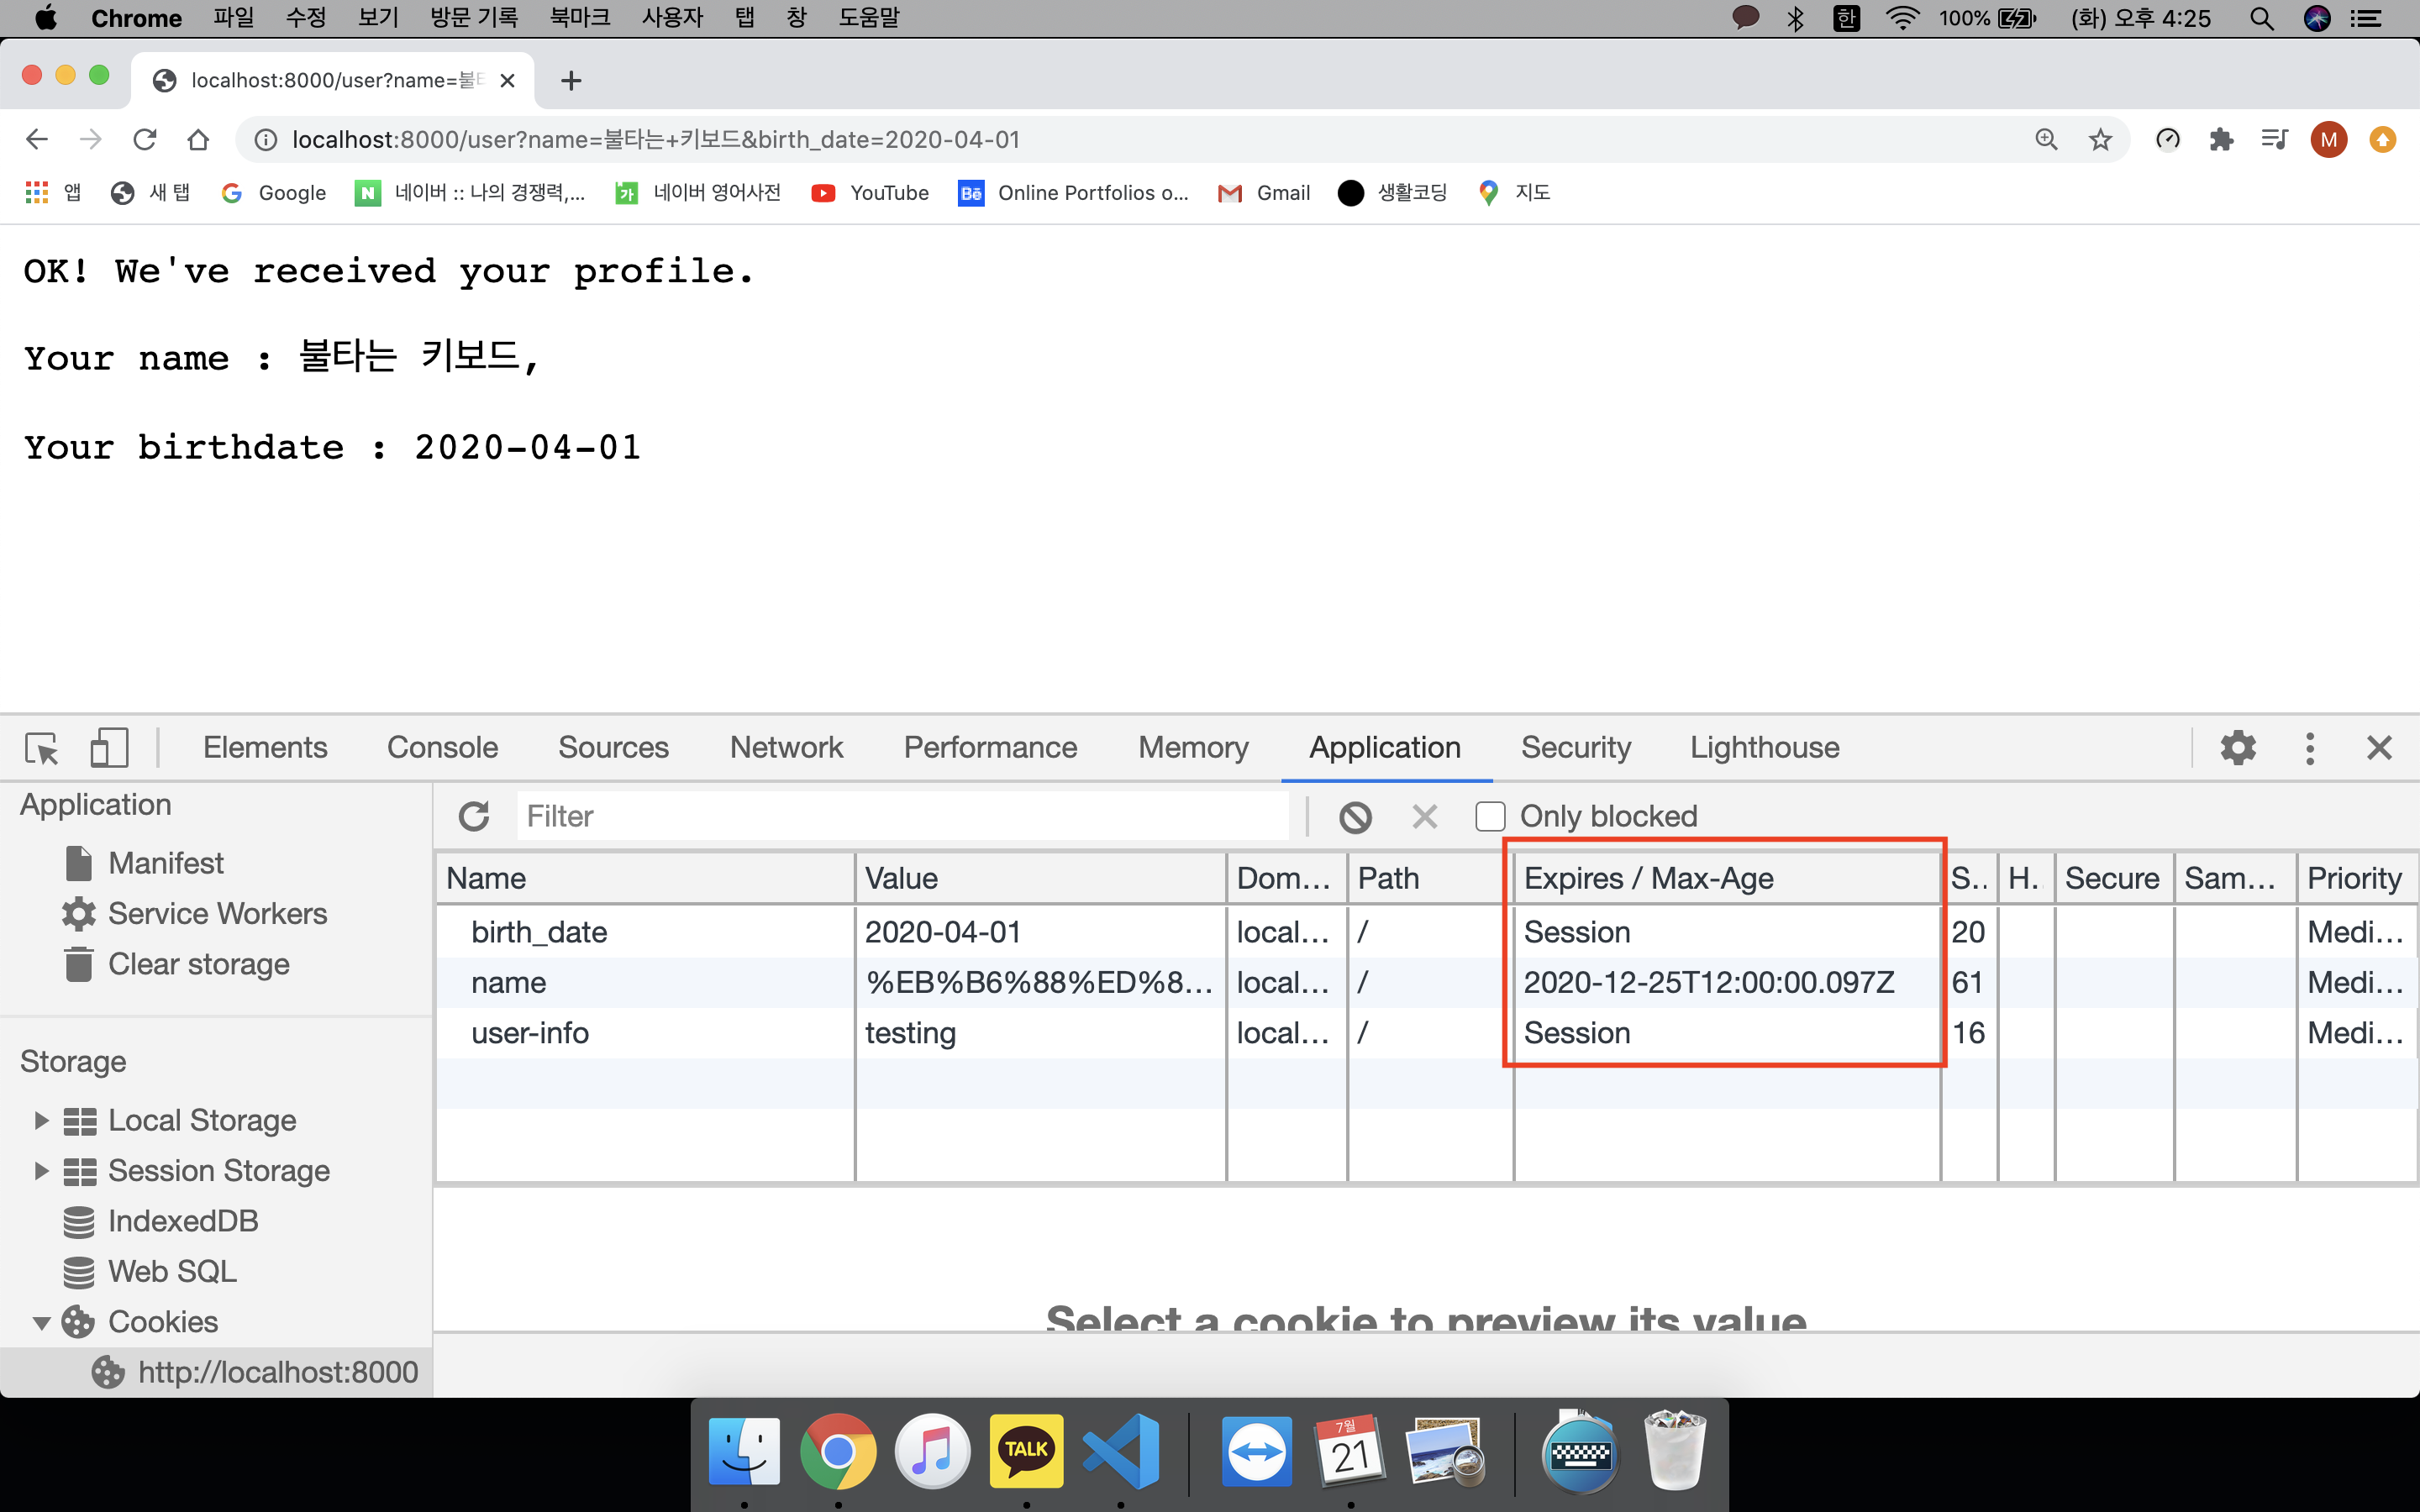
permanent cookies를 만들기 위해서는 Expires나 Max-age를 이용합니다.
Expires는 cookie를 파기할 날짜를 적고, 예시: Wed, 25 Dec 2020 12:00:00 GMT
Max-age는 cookie가 유지될 시간(초 단위)을 표기합니다.
아래, 5분 뒤 사라지는 쿠키를 작성해 보았습니다.
res.writeHead(200, {
  'Set-Cookie' :
  [
    `name = ${encodeURIComponent(name)}; Max-Age=${60*5}`,
    `birth_date = ${birth_date}`
  ],
  'Content-Type':'text/plain; charset=utf-8'
});
Expires를 이용한 예시는 아래와 같습니다.
올해 크리스마스에 소멸하는 쿠키입니다.
res.writeHead(200, {
  'Set-Cookie' :
  [
    `name = ${encodeURIComponent(name)}; Expires = Wed, 25 Dec 2020 12:00:00 GMT`,
    `birth_date = ${birth_date}`
  ],
  'Content-Type':'text/plain; charset=utf-8'
});
Secure & HTTPOnly
Secure와 HTTPOnly는 보안을 목적으로 한 옵션들입니다.
Secure
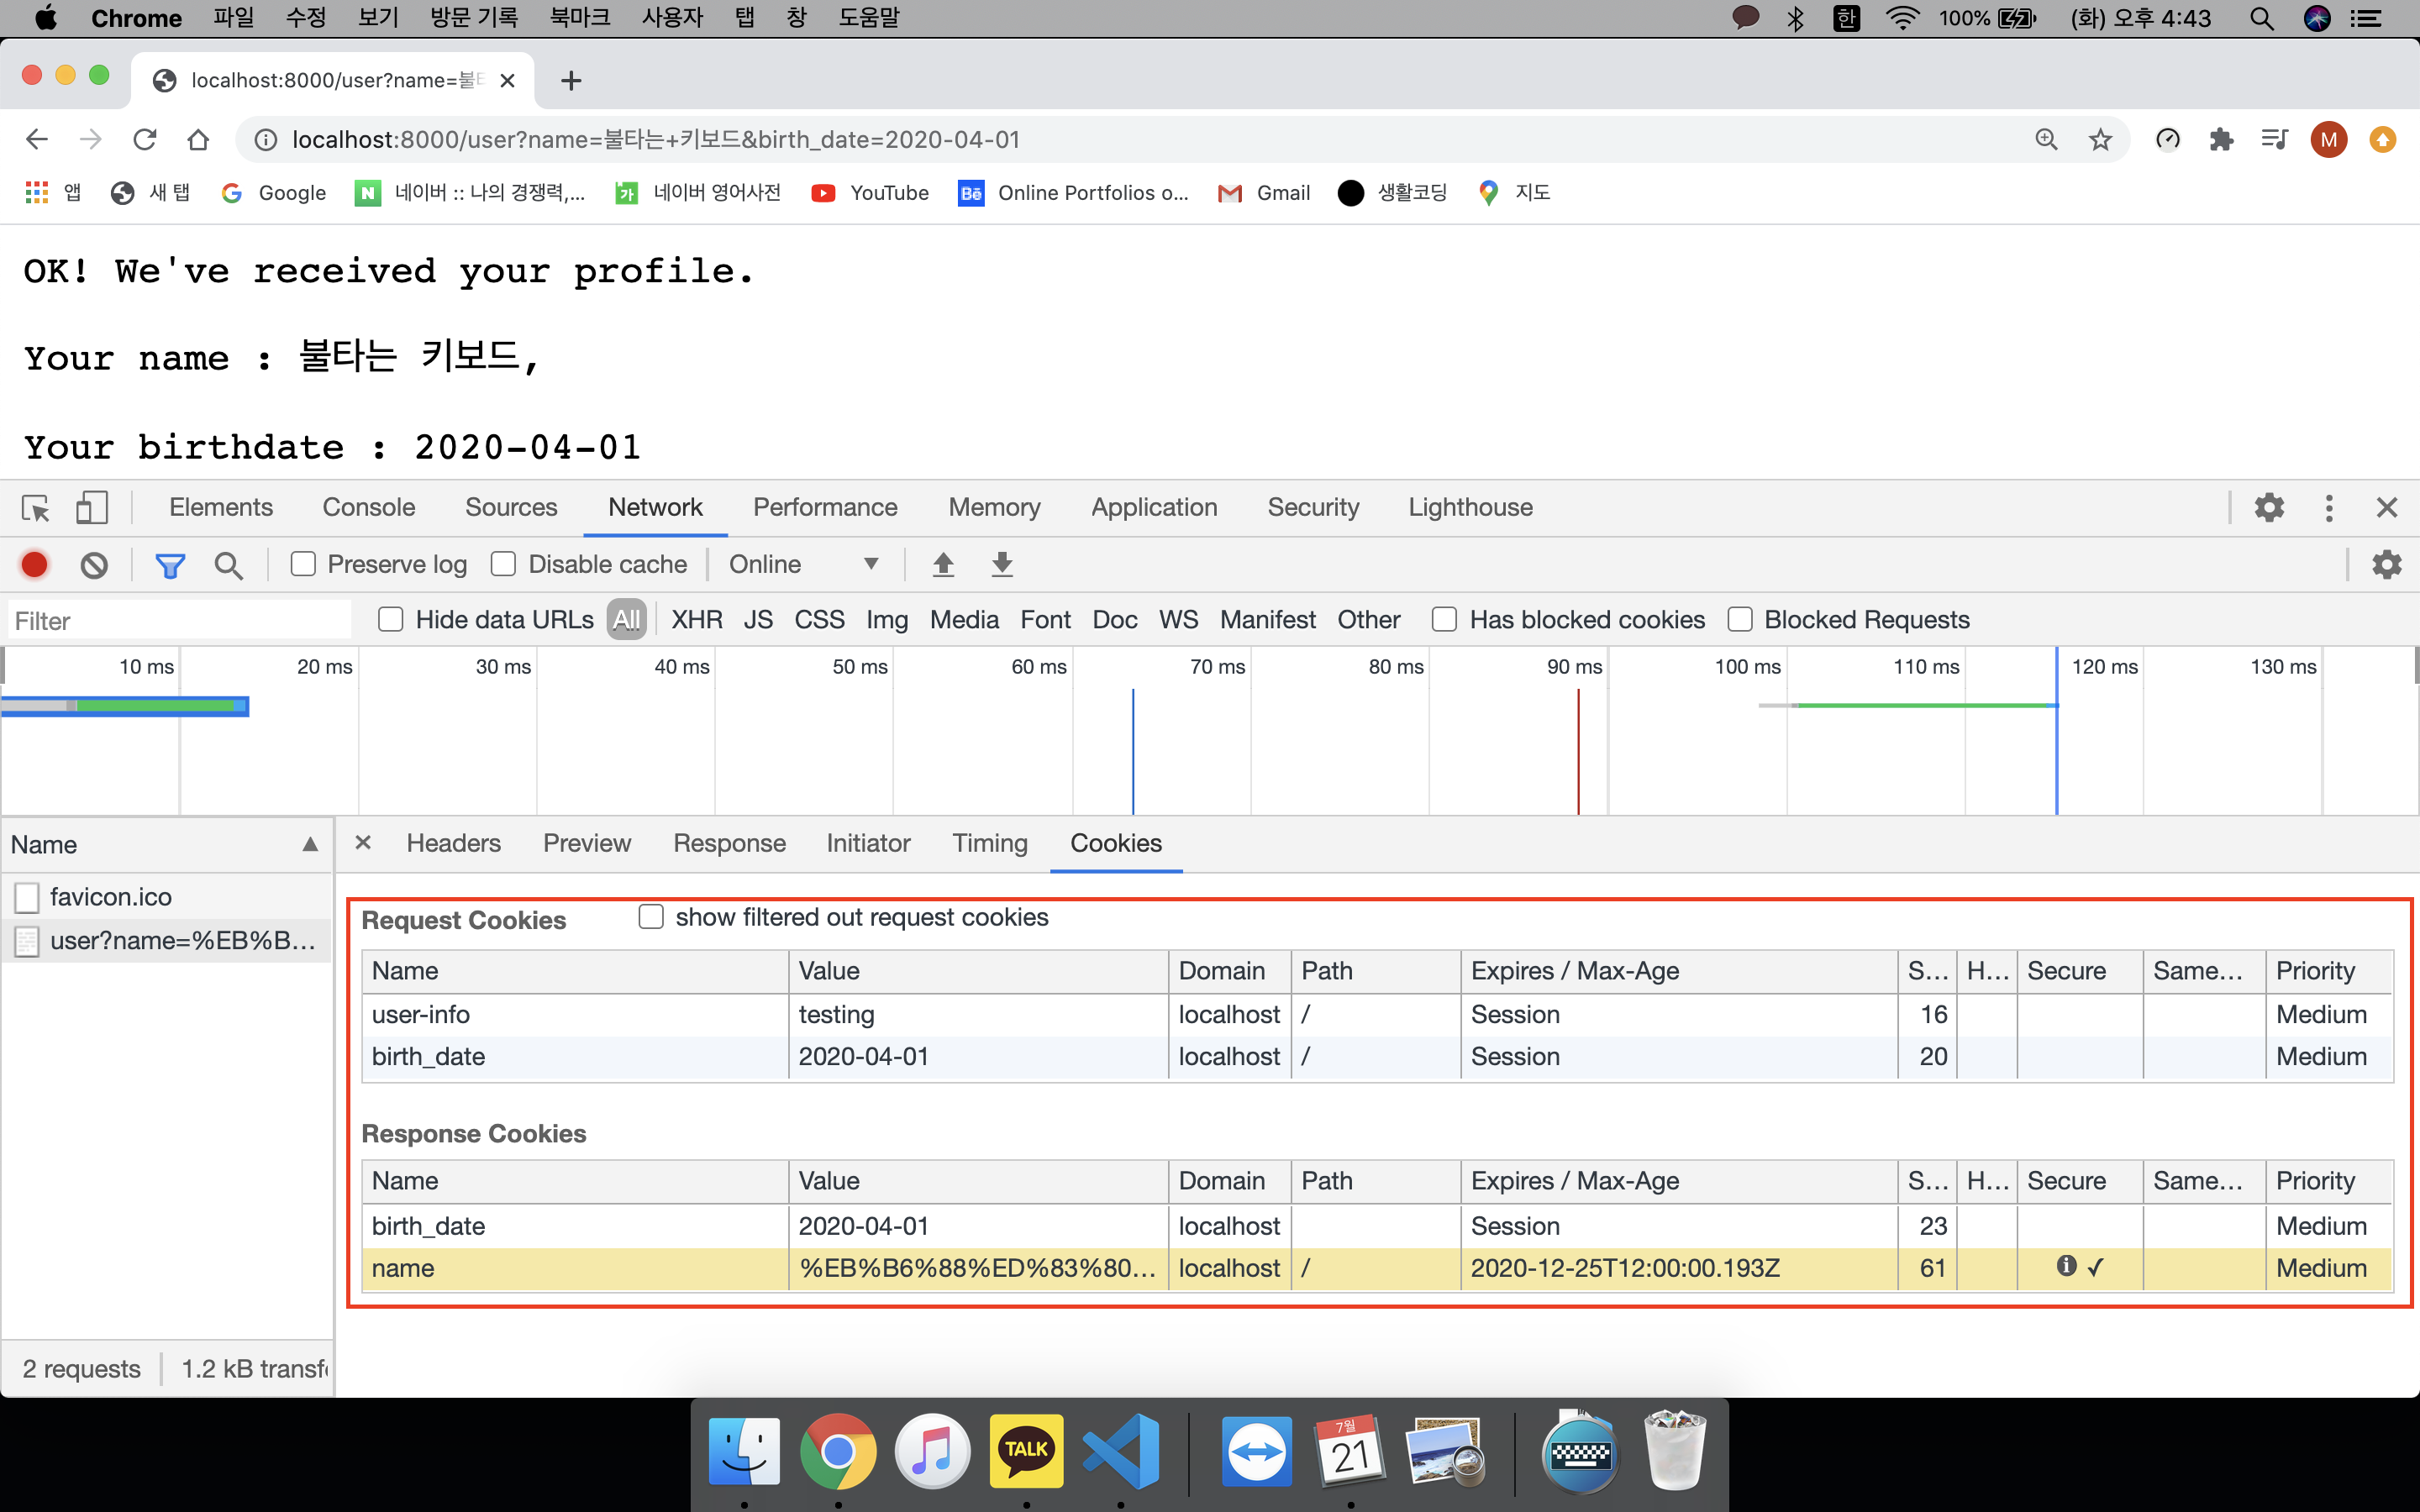
HTTPS를 통해서 통신하는 경우에만 쿠키를 생산합니다.
현재 이 연습을 하고 있는 배경은 HTTP를 이용하고 있기 때문에
Secure 옵션을 주면 Request에 쿠키가 찍히지 않게 됩니다.
따라서 req.headers.cookie를 불러와도 해당 쿠키는 목록에서 보이지 않습니다.
res.writeHead(200, {
  'Set-Cookie' :
  [
    `name = ${encodeURIComponent(name)}; Expires = Wed, 25 Dec 2020 12:00:00 GMT; Secure`,
    `birth_date = ${birth_date}`
  ],
  'Content-Type':'text/plain; charset=utf-8'
});

HTTPOnly
HTTPOnly는 서버통신시에만 쿠키를 담는다는 설정으로서,
해커들이 Javascript를 활용해 웹브라우저에서 쿠키를 가로채지 못하도록 합니다.
이름에 적용했던 Secure값을 다시 없애고, 이번에는 생년월일에 이 값을 적용해 보겠습니다.
res.writeHead(200, {
  'Set-Cookie' :
  [
    `name = ${encodeURIComponent(name)}; Expires = Wed, 25 Dec 2020 12:00:00 GMT;`,
    `birth_date = ${birth_date}; HTTPOnly`
  ],
  'Content-Type':'text/plain; charset=utf-8'
});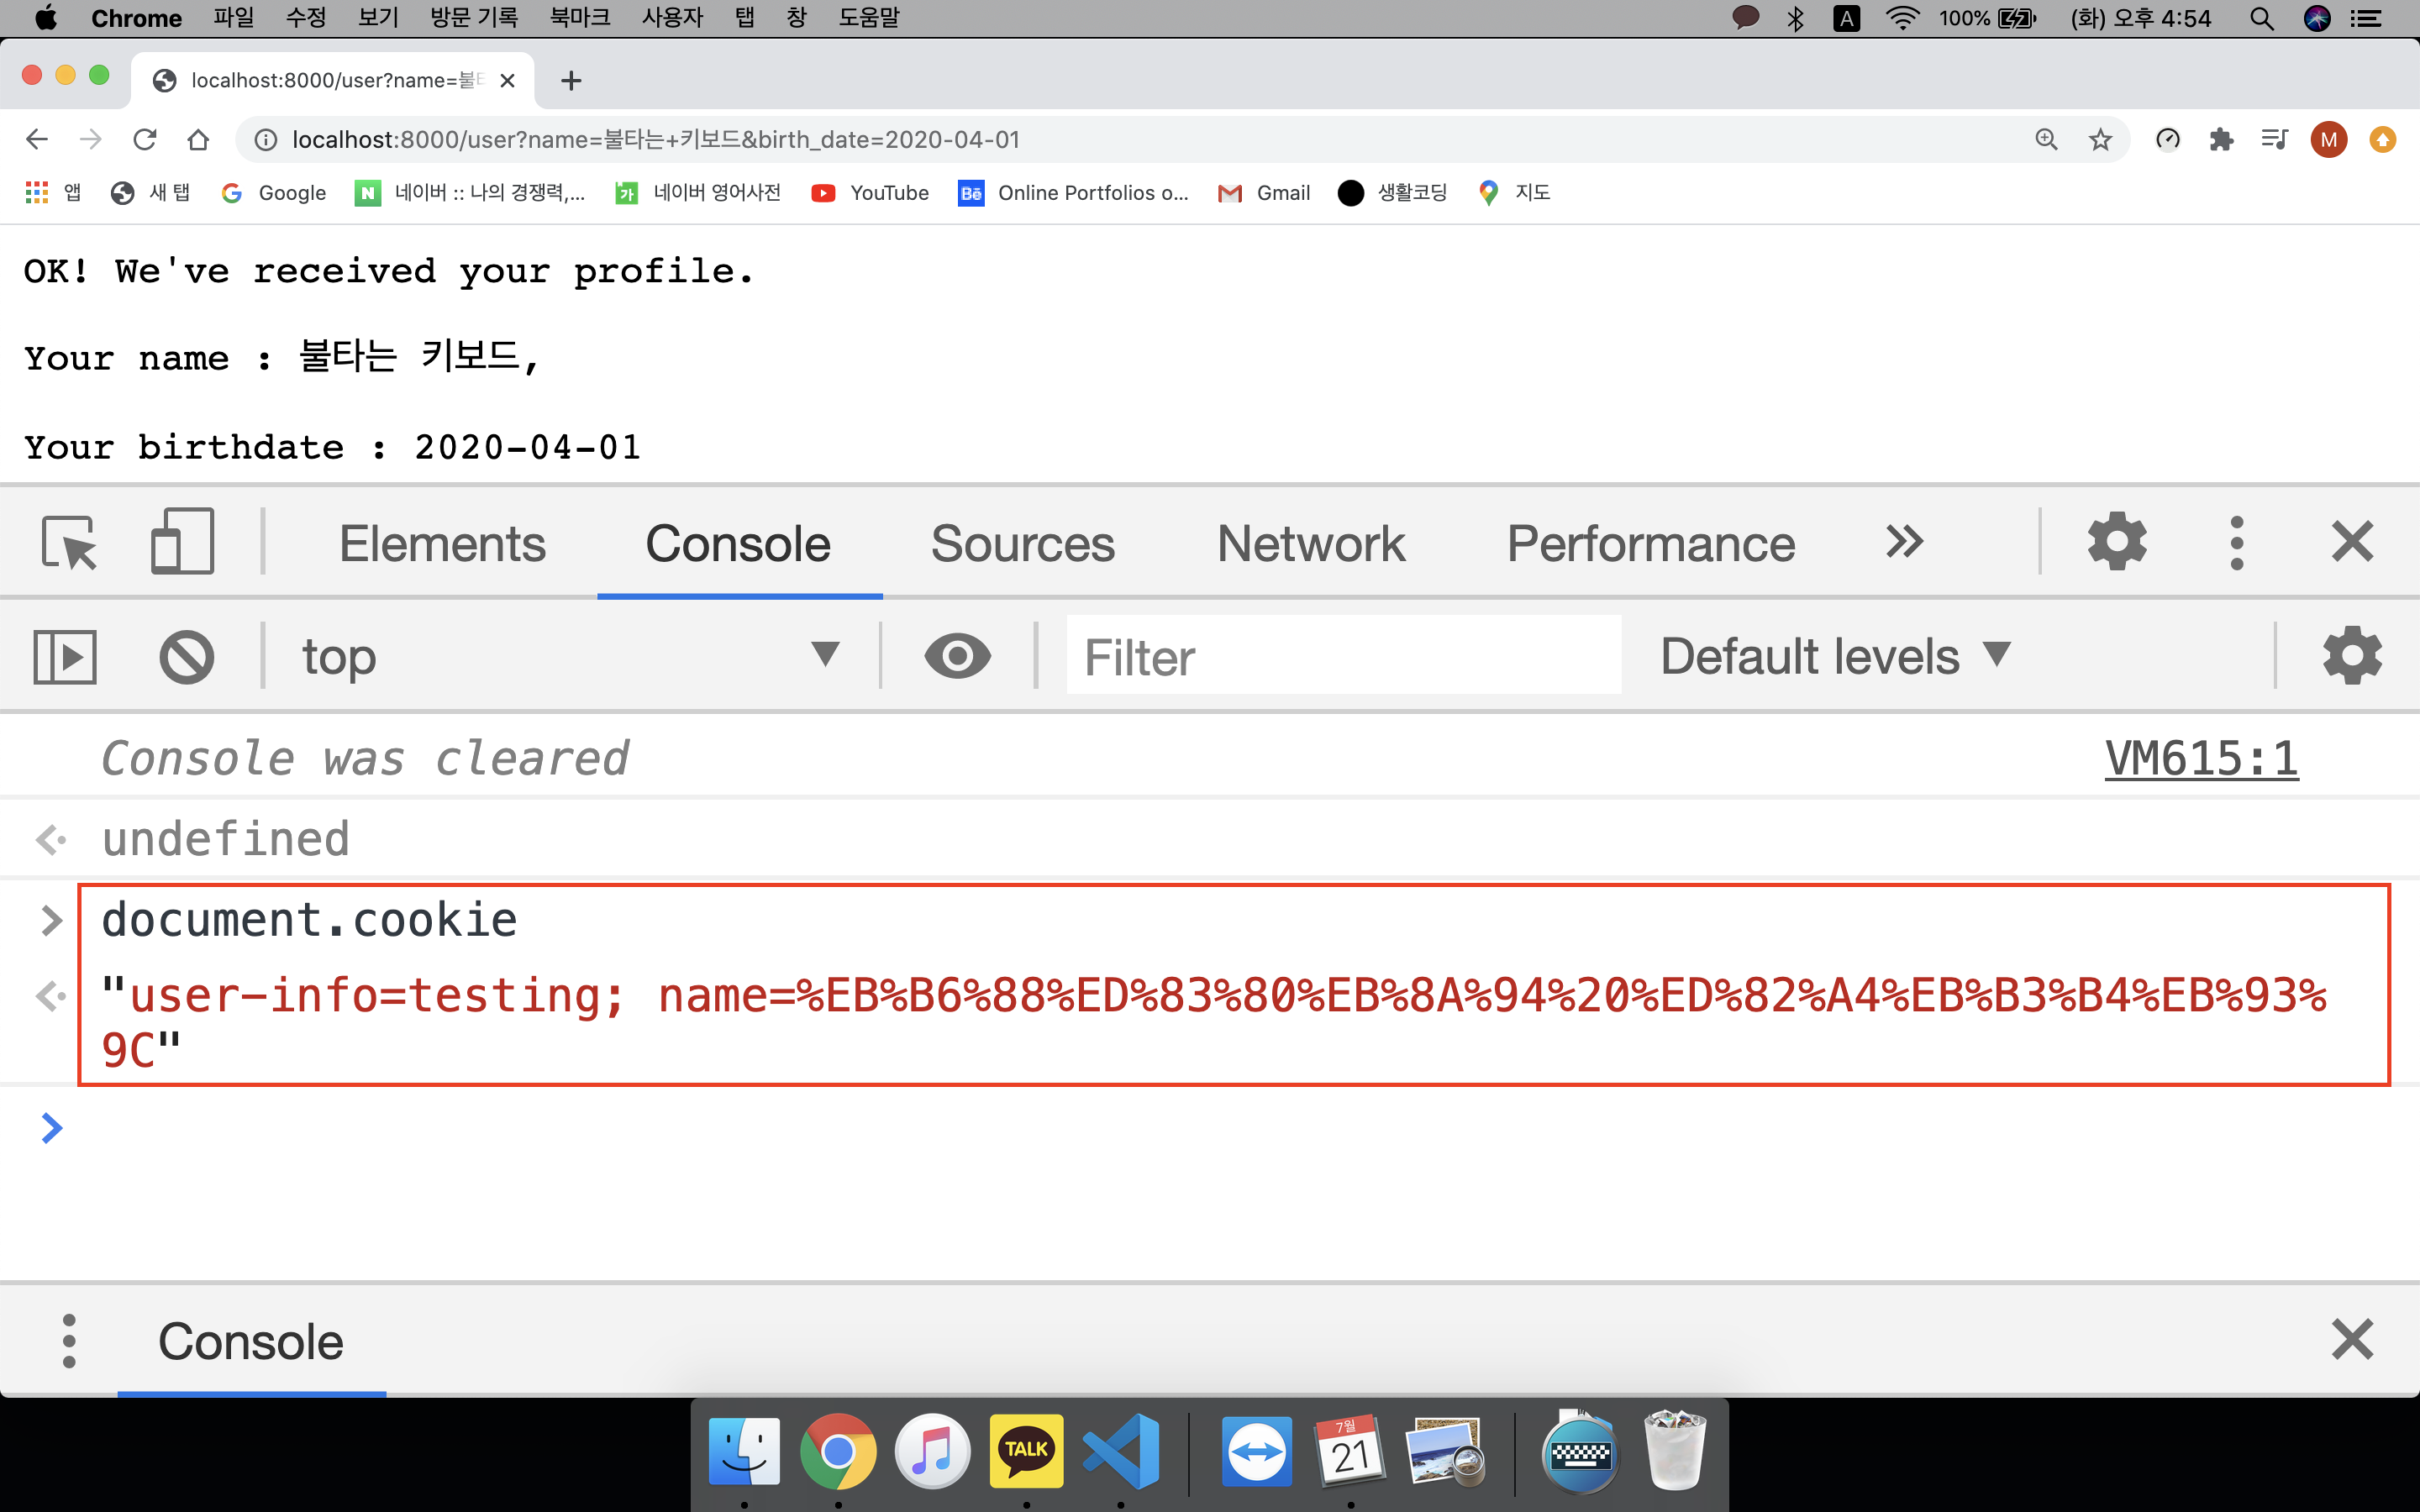
웹브라우저에서 javascript를 이용해 cookie의 정보를 불러오니 HTTPOnly 값이 적용된 birth_date는 뜨지 않습니다.
Domain & Path
Path
Path는 해당 Cookie가 유효하게 적용될 루트를 설정합니다.
Path = / 라면 가장 최상위 루트이기 때문에 어느 디렉토리에서든 쿠키가 유효합니다.
하지만 특정 주소에서만 쿠키가 작동하게 하고 싶다면 얼마든지 설정이 가능합니다.
이름과 생년월일의 유효path를 다음과 같이 설정해 보았습니다.
res.writeHead(200, {
  'Set-Cookie' :
  [
    `name = ${encodeURIComponent(name)}; Path = /`,
    `birth_date = ${birth_date}; Path = /user`
  ],
  'Content-Type':'text/plain; charset=utf-8'
});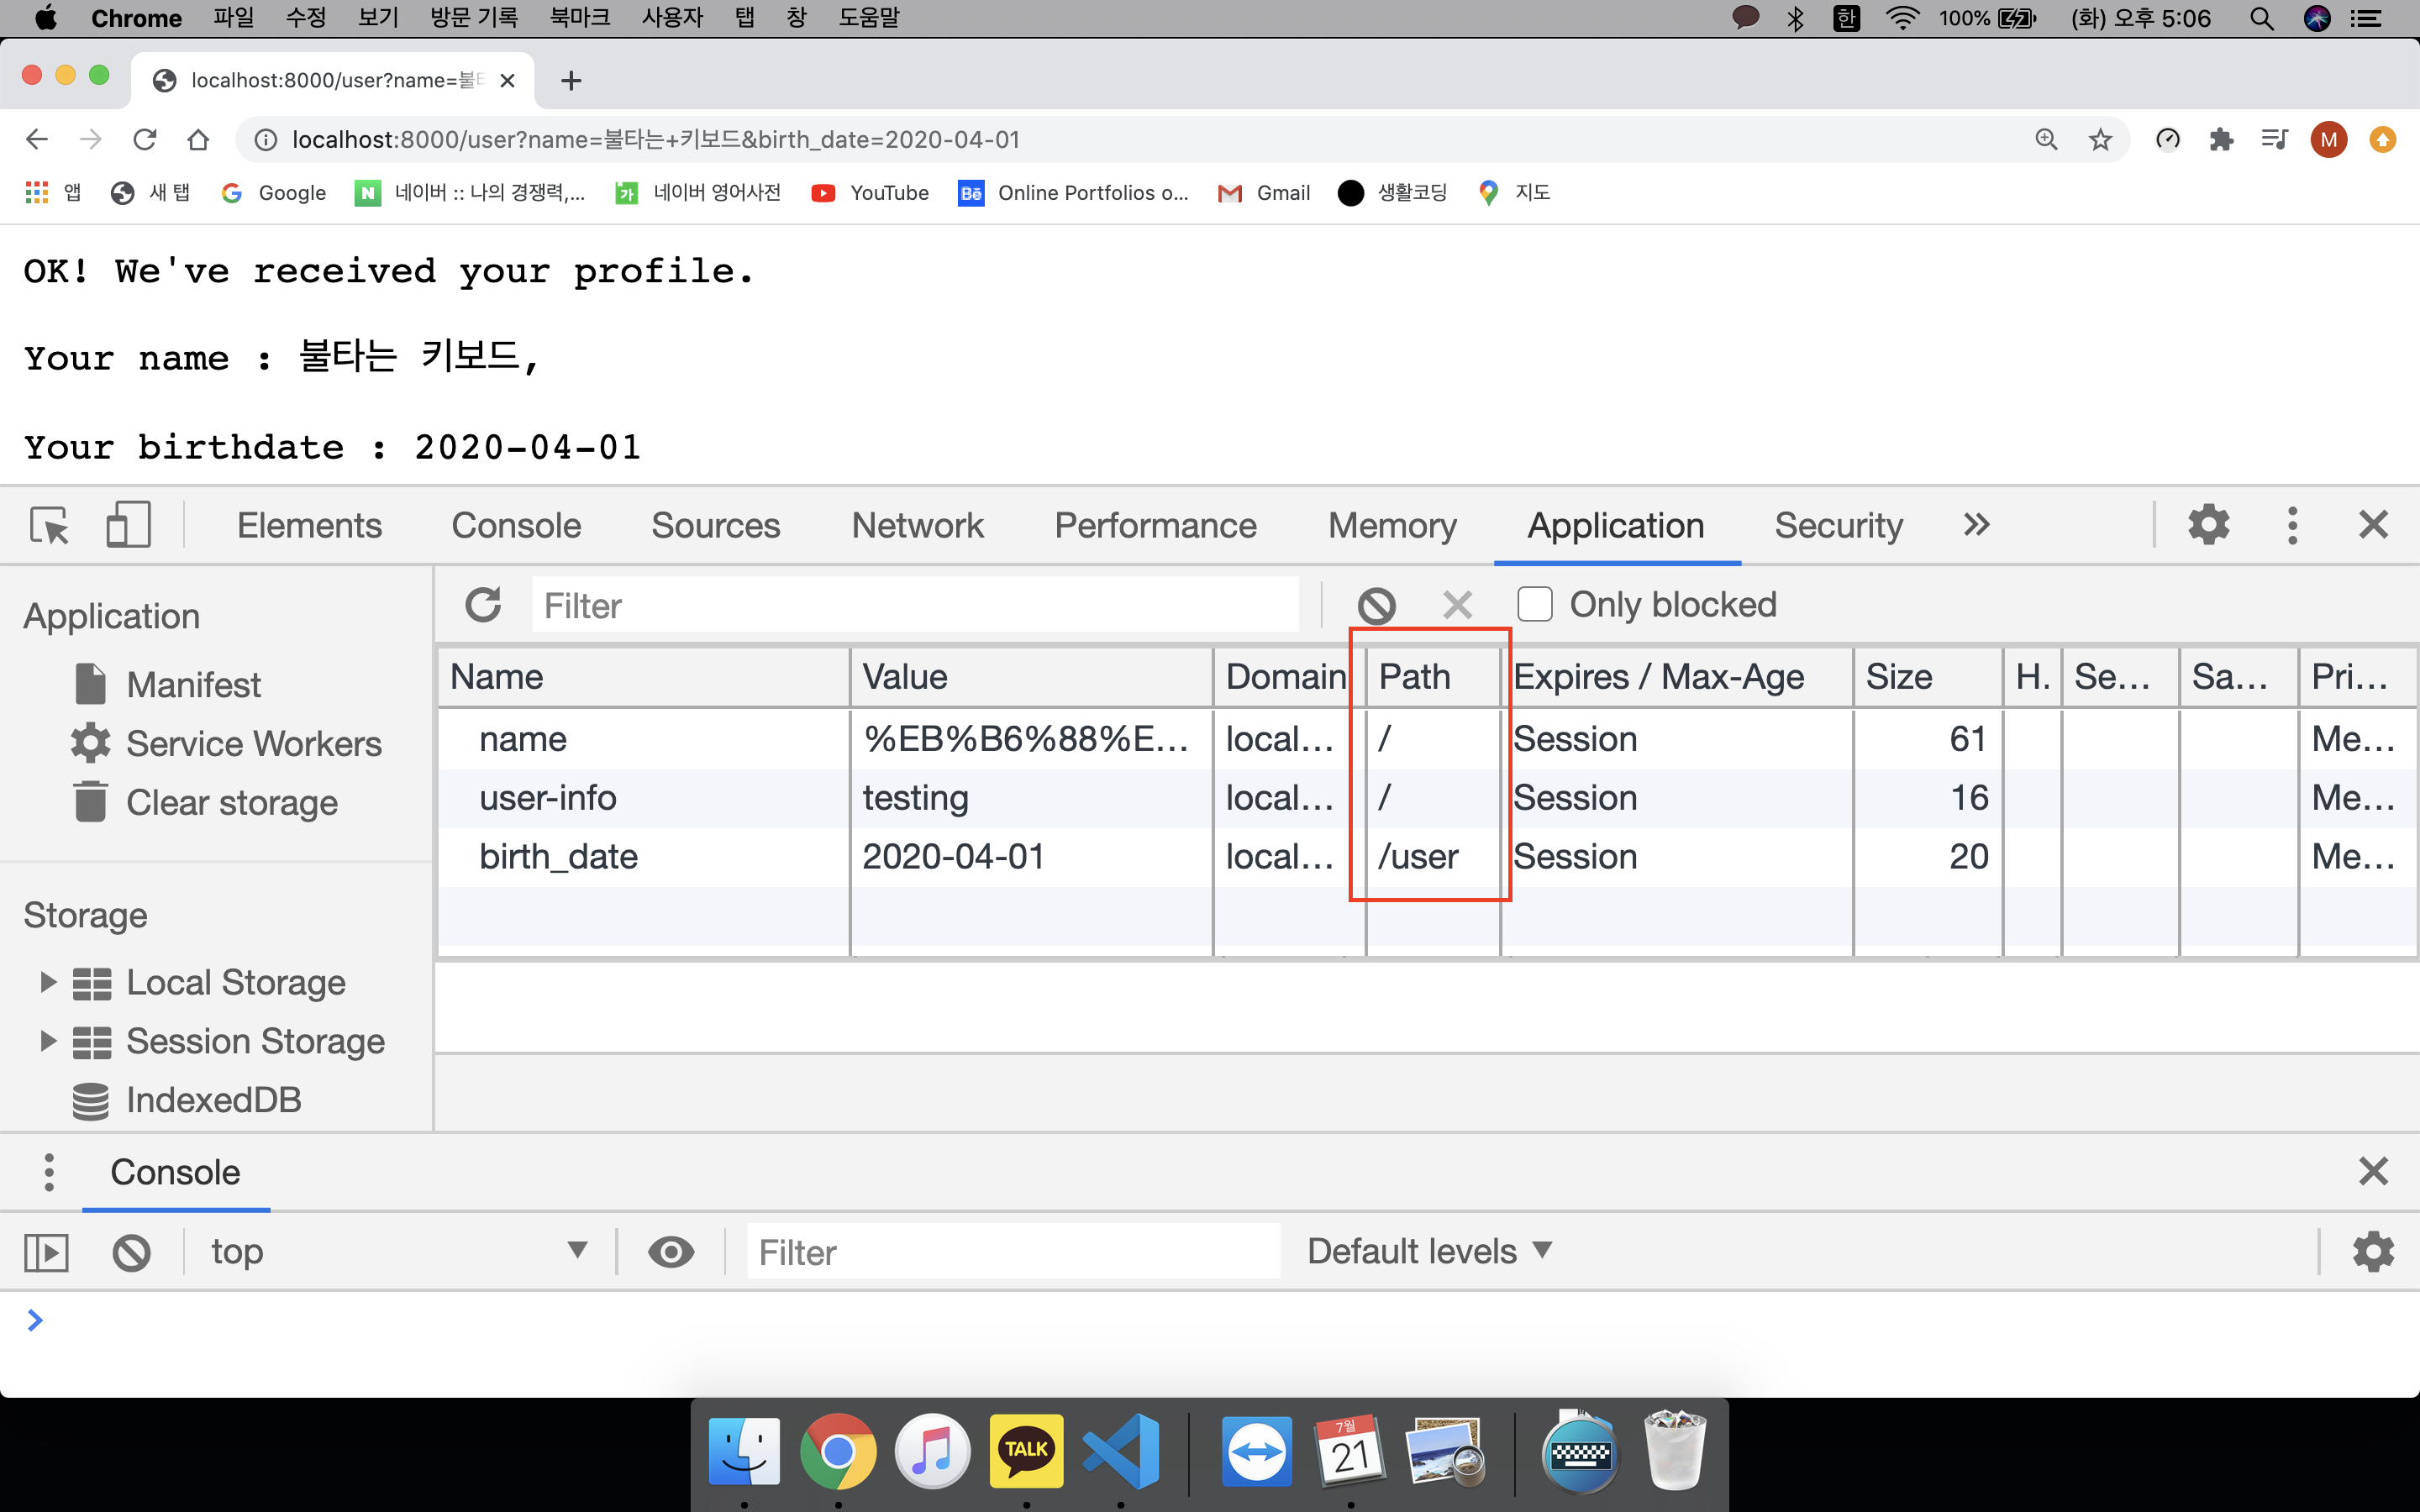
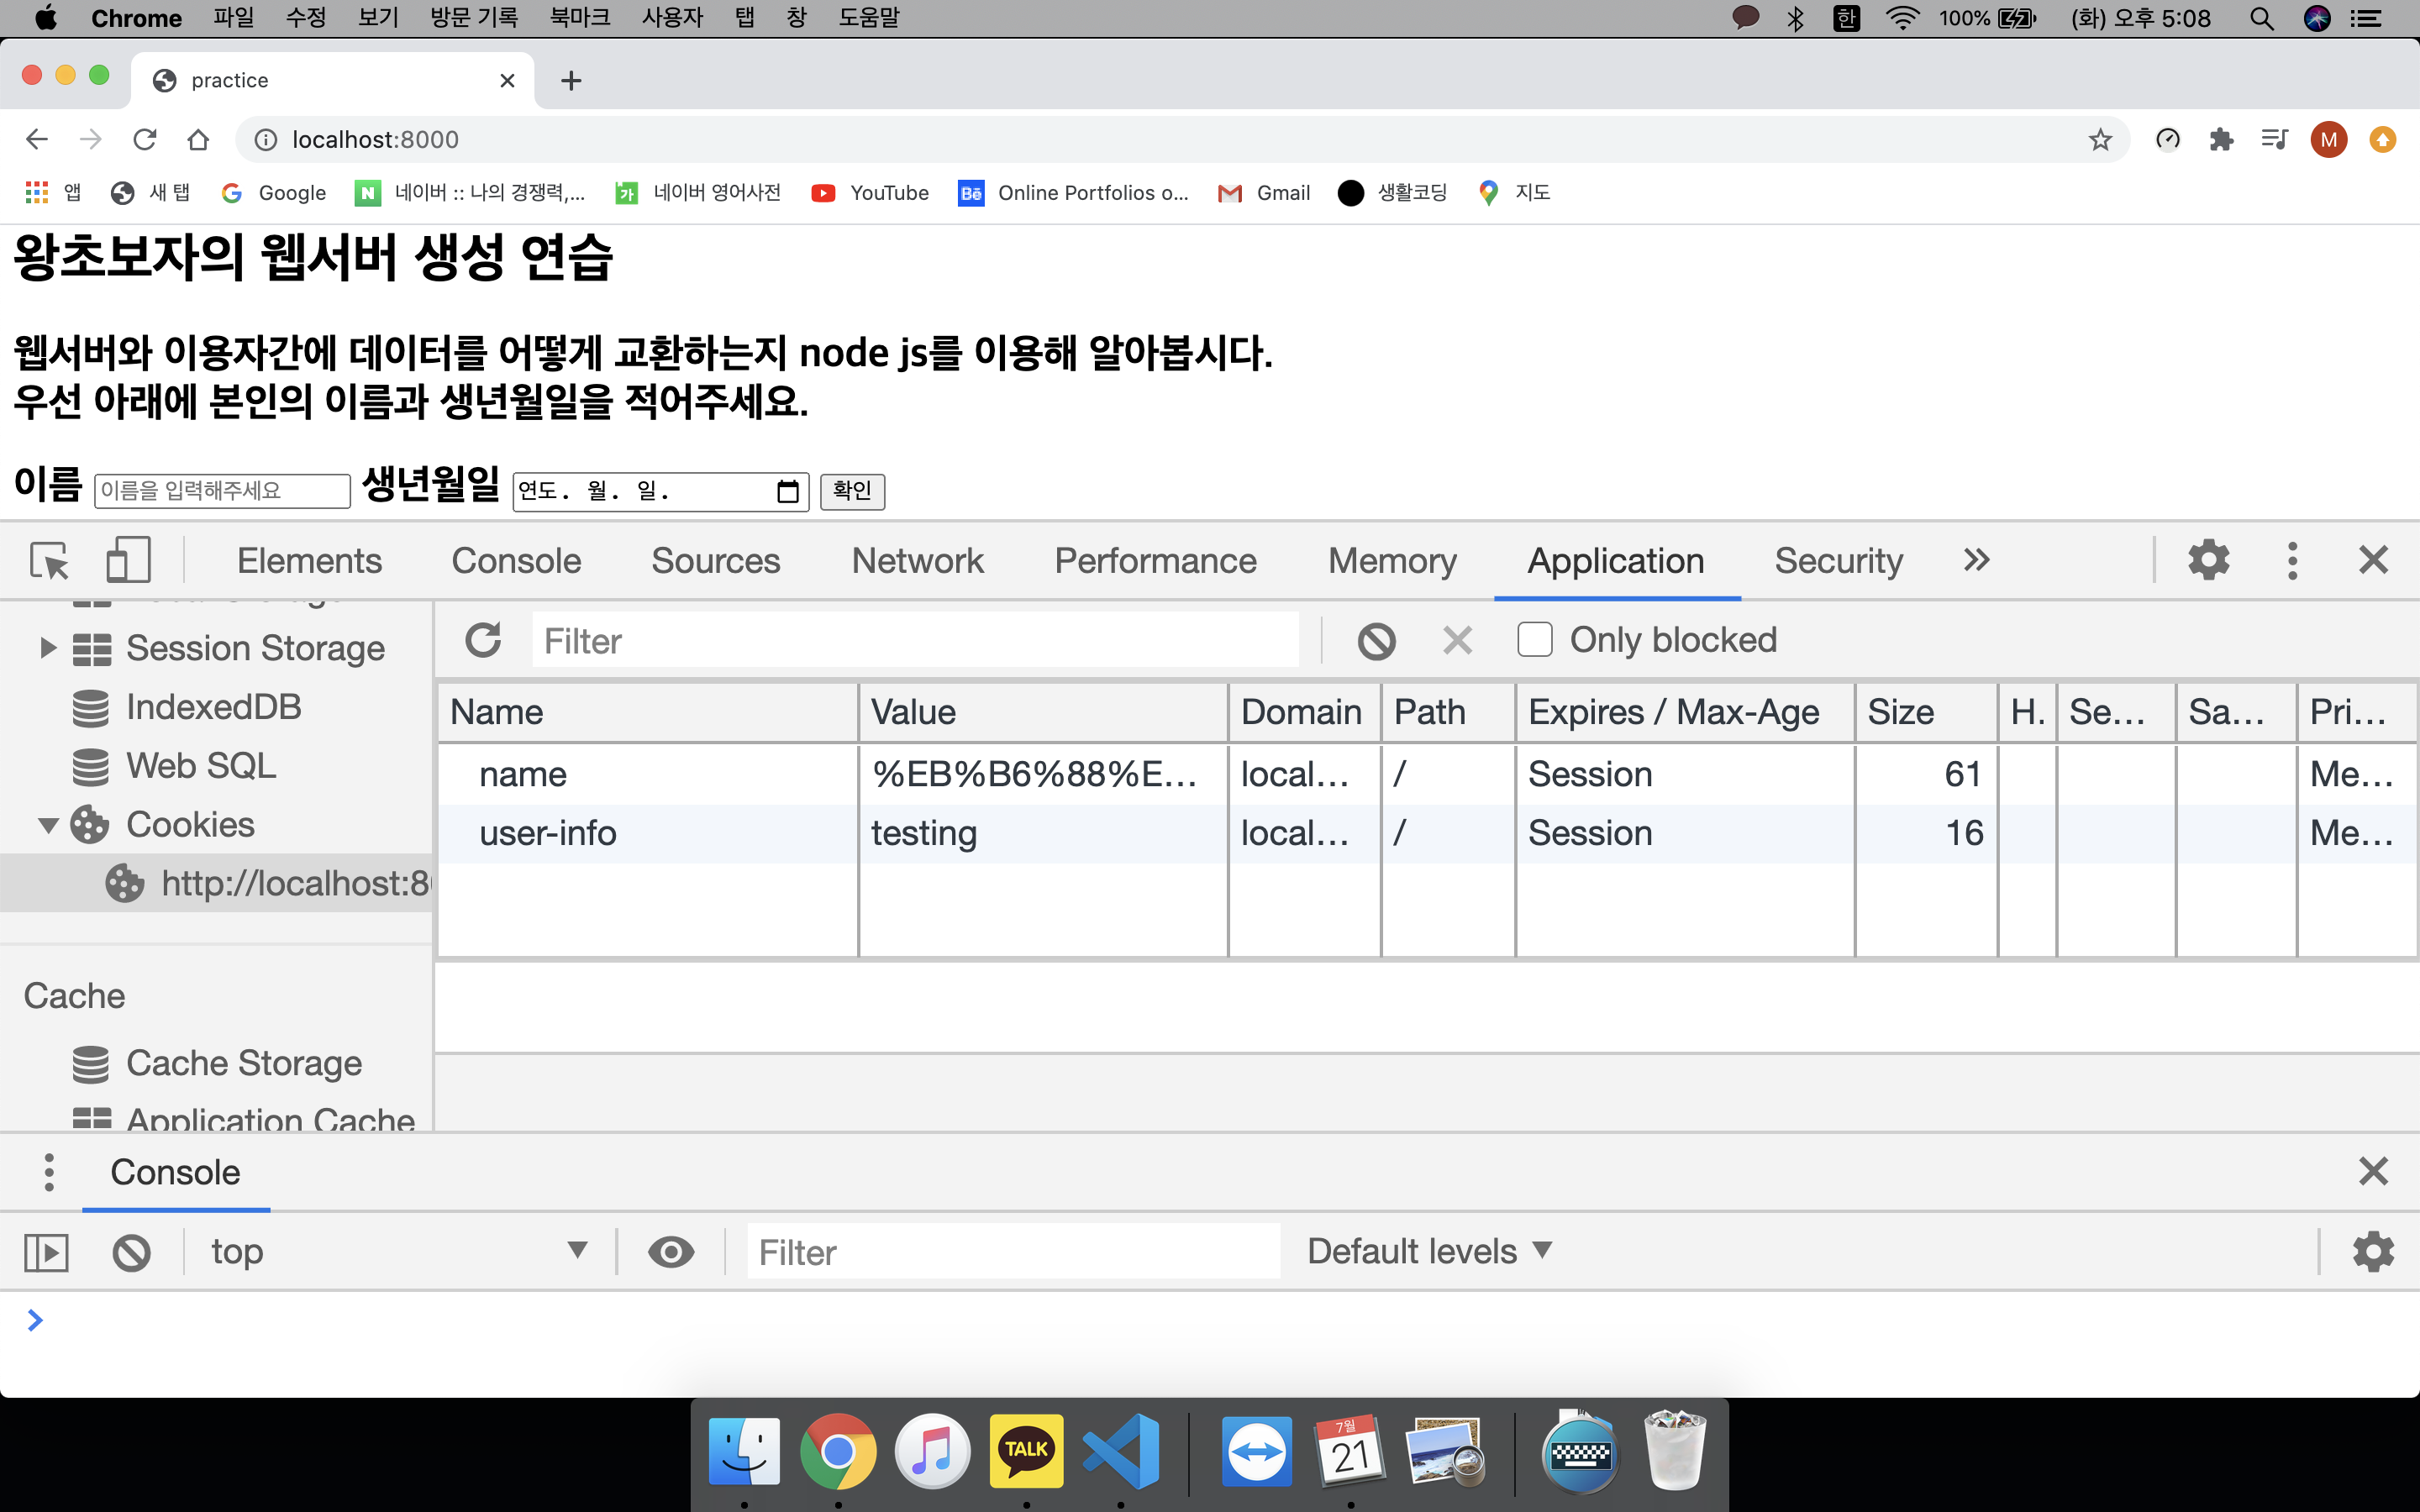
이 상태에서 다시 localhost:8000/로 돌아가면 birth_date는 보이지 않게 됩니다. 유효path가 아니기 때문입니다.
하지만 다시 localhost:8000/user로 접속한다면 birth_date는 다시 나타납니다.
(+path=/user 로 되어 있으면 해당 path의 하위 디렉토리에도 쿠키는 살아있습니다)
Domain
domain 속성은 해당 쿠키를 공유할 도메인 주소를 나타냅니다.
즉, domain 속성을 설정하지 않는다면 쿠키를 생성하는 해당 서버에만 쿠키가 전송되며,
domain 속성을 설정한다면 그 속성값에 적힌 서버에 쿠키의 정보를 보낼 수 있게 됩니다.
이러한 속성이 존재하는 이유는 다양한 서버를 아우르는 하나의 시스템이
각각의 서버에서 얻은 쿠키를 한 번에 활용할 일이 생기기도 하기 때문입니다.
예를 들어 네이버라는 하나의 시스템이
endic.naver.com (사전 서비스), maps.naver.com (지도 서비스), mail.naver.com (메일 서비스) 의 서버간에 쿠키를 공유하게 하고 싶다면
Domain=naver.com 이라는 옵션을 두어 그 하위 도메인간에 쿠키를 주고받게 할 수 있게 됩니다.
⬇️실습방법
https://dololak.tistory.com/543
[서블릿/JSP] 쿠키(Cookie)의 domain 속성 설명. 쿠키 전송 범위 설정하기
이전글 [서블릿/JSP] Servlet/JSP 환경에서 쿠키(Cookie) 사용 방법 [HTTP] HTTP 쿠키란(Cookie)? 쿠키 등장 배경 그리고 쿠키와 세션의 차이점. [서블릿/JSP] 쿠키(Cookie)의 path 속성으로 전송 URL 지정하기 도..
dololak.tistory.com
'프레임워크+라이브러리 > Express' 카테고리의 다른 글
| Node.js / express 이용하기 ( res.send() ) (0) | 2020.07.25 |
|---|---|
| Node.js / path 모듈 (0) | 2020.07.23 |
| Node. js / 라우터 분기 처리 / 쿠키 수집 part 2 (0) | 2020.07.21 |
| Node.js / 라우터 분기 처리 / 쿠키 수집 (0) | 2020.07.20 |
| Node.js / crypto module(단방향 암호화) / 해시 생성 (0) | 2020.07.17 |


댓글 영역